Friday, October 06, 2006

I believe previous posts cover the basic idea of how I designed and made my car-computer, or "mp3car".

Below are pictures I took during the process of making it.


This is the layout of the cutting pattern I made,
before creating a 1:1 ratio drawing on the actual
wood parts.
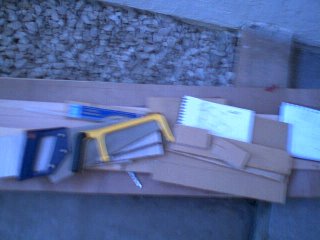
Oh, the wood parts were from spare cabinet parts my mom allowed me to cut up.


Here you see somewhat blurred image of wood parts and some are already cut to size.
My main tools were the two saws on the picture. My arm ached after sawing all the parts but it's been a while since I enjoyed a good sawing.
Besides them, hammer and nails were used in actually connecting the cut boards.
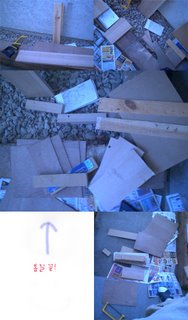


Here all the wooden parts have been cut up and laid out
neatly for the photo-shoot.


In Korean it reads
, "Sawing done!"


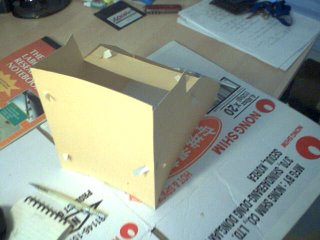
Formed the box by just stacking up the wooden parts
to see how it looks before nailing them together.
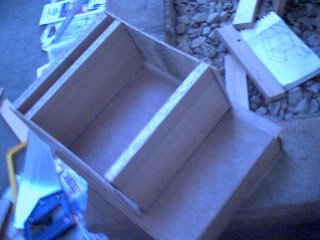


Opened the top cover, er.. removed it, to show how the power supply and the HDD will be positioned.
The bigger space will be divided by a wooden panel
to put the HDD and the power supply.


Stashed all my parts in a corner of my room
before I started building the "mp3car."
I was gonna make the computer turn on as
I turn on the ignition, so that why you see relays there.. well, I guess the picture's not that clear.
Anyway, I had more parts than I actually used.


Above are some of the installation pictures I took of the mp3car.
You can see the switchbox still has the clear switches I made, which broke to pieces
after 20 presses. I guess using a glue-gun to paste Tupperware-like plastic to hard plastic
is not the best option to make a sturdy, long plastic stick for making switches.
After that I turned to Radioshack's premade switch that has a round, smooth, small red botton
and screws that attached firmly to the switchbox.

This was the project of summer of 2004.
This summer, alot of things happened.
I got accepted to UCLA CSE major as transfer student.
I finally asked out the girl I had crush on for two years,
..but it didn't work out.
I made this mp3car computer.
I had the damnest good time with the girl of my crush -
I spend time tutoring physics with her,
She came as teacher's assitant to a junior high retreat
where I was one of the teachers.
It was an AWESOME summer,
summer of 04 :)
Now I had all the parts and a general idea of what I was going after.

Another problem came up.
How would I fit them all in?
What casing would I use?
How do I update songs?
How would I turn the computer on?

For the case I decided to just saw wood and make a box out of wood.
It would have to be made as compact as possible and the design I came up with
had a motherboard enclosure in the lowest box, which cover had a space for power supply
and HDD, and that space was covered on top by a cover, latched so it could be opened for any maintenance.

Here's some renderings of it on paper and also in 3D:


Above right one is me with the box model. hahaha.

The picture above has the dimensions and etc.

For updating the songs, the only efficient way I thought of at the time and also not spending more money on parts, was to transfer via network.
I'd take out the Ethernet PCI card during when I'm using the mp3car (name I gave to the computer I'm building) because in order to make the box compact, I had to take it out.
When time came to update because I heard all my songs, I'd plug it in, enable Ethernet,
and transfer via Windows Networking.
It's just a bit tedious because the file that has the list of .pls files has to be updated,
and the .pls of the new album I'm uploading should have my recording of announcing the album on top, so that has to be recorded.

For turning the computer on, the Hyundai MultiCav desktop computer had a frontboard switchboard that had the Power, Reset buttons on. I tried pulling out the switches directly but I wasn't able to. Lack of tools.

So, I made a makeshift button out of.. Radioshack buttons, and pulled the switch signals
directly from pins of the switches on the boards by soldered wires.
I bought a 3-pack Tupperware ripoff-like small compartment containers from Marukai 98cents store. They have cuter and necessary stuff that seem better in quality than 99c store, I guess since it's a Japanese store. This became the little box I glued on to the box - my switchbox!

Having just buttons weren't cool enough. I also decided to pull LEDs off the board and make them shine inside the switchbox. Now the generic green and yellow LEDs weren't bright enough,
So I used my ultra-shine blue LEDs I bought some time ago in Korea to spiff things up.

Oh, there were a lot of wires that had to go into the switchbox, so I just used a LAN cable, with one end of the inner wires hooked up to relevant positions in the board and the other end hooked up to portions inside the switchbox. I think this solution is neat - MacGuiver level neat.

Power is gotten from cigar jack, into the inverter, where computer's power jack is attached.
I think it's good to have inverters because it provides 110V generic outlets - stuff you have at home. I was able to make this work using the cigar jack because the computer comsumed small amounts of power, but people strongly dissuade going this route to get power. Turning on the inverter was by a switch attached to the inverter, but I pulled it out and attached it to my switchbox since the inverter was gonna get stashed away way down and back of the bottom of audio compartment, or here:

All photos were taken by a crappy Sony-Ericsson T90 cellphone I had during the time of making the computer, which was like during the summer of 2004.

Reason: Cheap, and I can get experience. I have alot of the parts already. And the notion of resurrecting a capable machine out of old, outdated parts invoked the Mad Scientist in me.

Conditions: I don't have money to put a neat fiberglassed layout or get a good LCD. So, this is what I stuck with:

Computer gets power from car.
Computer outputs sound from headphone jack, which will go to tape deck, using the stuff.
MP3 Control is by a remote control from X10 Systems, which they gave away for free during my times of scourging for parts across the Mp3Car forum and the generic Internet.
The button input will be gotten by LIRC or WINLIRC(Windows version) or any other RF-Signal receiving device. I've made a receiver that would get input from normal Infrared remote controllers but Since the free X10 remote had its own RF USB receiver, I just used it.

.. However, it turned out I had to use UHC? I don't remember the exact name of the program.. but a time-frozen "freeware" of the commercial program to get the input into the computer.

The signal is then converted by the UHC program into a key press. Since Winamp will also be turned on, and the key press will be directed to Winamp, the key press will be hot keys that Winamp reacts on.

To add more functionability I have wrote a fairly simple plugin which adds more hotkeys to Winamp, which will, with another file, create the ULTIMATE ALBUM TURNER!!
=========================
ULTIMATE ALBUM TURNER:
The plugin is a dll file. It will read a file input, which will have lists of playable playlists(list of .pls files). This list will be put into an array, which, upon designated keypress, will traverse back and forth and load the relative playlist.
No screen and change of playlist (which I affectionately call 'albums' cuz songs have been categorized in such way).. how did I solve the problem of not knowing what is being played?

HAHA. This is a problem with most MP3 players. Yeah, you have your fancy nancy displays,
which display folders which is inside your mp3 player flash ram. But while selecting your next favorite song to play, you get detached from the listening mode to fiddle with little buttons and squint to see your little displays (I'd say Ipod or Nano is still too little). I mean c'mon. This is a world where you want your songs to be played endlessly with little or no intermission as possible.

This problem is significantly important when you're driving right?
So I came up with this BRILLIANT GHETTO approach:

Each playlist, which is a list of mp3 files to play, has one file that is played first:
My recording of my voice, made to sound cool and deep, that states the name of the album.

VOILA! I can drive, I don't need to veer away from the road to look at any screens (well I don't have one but I don't have to if I have one), and I'm super safe and super cool listening to songs and switching albums without increasing my car accident possibility.
========================================================
Windows 98SE has been used, and it was stripped of any capabilities that I wouldn't need to increase its speed using 98Lite, a program offered.. search for it by Google.
They also have XPLite, and both can pretty much strip most of things out during the installation process of the operating system.

So Here's The Spec:
200MHz MultiCav Hyundai computer (yeah Hyundai used to make computers as well)
5 Gig Harddrive
Ethernet PCI card
Generic VGA card
X10 Remote Controller and receiver (It's OEM also sold as ATI Wonder remote)
I don't have a cd player in my 1995 Previa S/C (supercharged van.. ever heard about it?).
So that is why I even started to think about a mp3 player inside my car.
SURE
I could have just bought a MP3 player deck for my car.
BUT I have found out http://www.mp3car.com , where they tell you alot of information about
making a computer to be inside a car.

So I have found out:
I have an old 200MHz computer just sitting in my garage.
I have a 5 gig HDD I got from a friend ( I should say for the purpose of making this)
I got a DC to AC inverter at Fries.
I have seen how to hookup wirings in my car.

Excuse my bad grammar, but I am not good at English grammar(CS major, no essay hw for 4 years, do the math).
Well I'll by frank with all of you.
This is a small attempt to explain myself and what I've done.
And since I thought of putting this link in my resume I am writing this abruptly to add the info about how I made my mp3car.
I hope this is a good attempt to get in the eyes of my recruiters, but we'll see...
Update of my project will start.