Now I had all the parts and a general idea of what I was going after.
Another problem came up.
How would I fit them all in?
What casing would I use?
How do I update songs?
How would I turn the computer on?
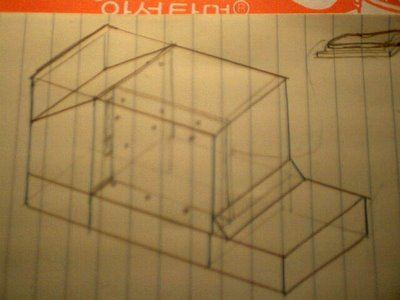
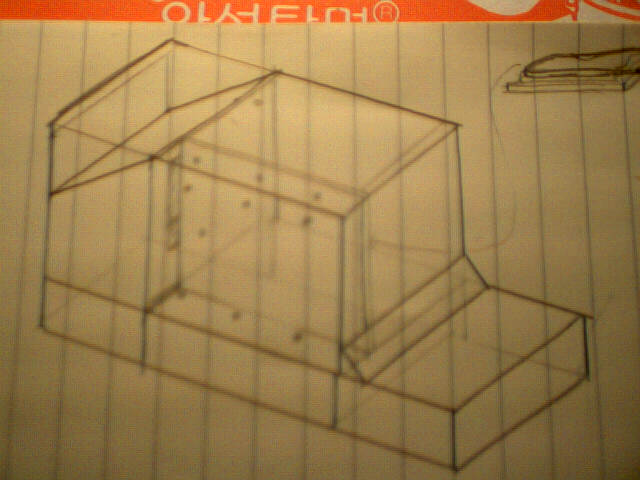
For the case I decided to just saw wood and make a box out of wood.
It would have to be made as compact as possible and the design I came up with
had a motherboard enclosure in the lowest box, which cover had a space for power supply
and HDD, and that space was covered on top by a cover, latched so it could be opened for any maintenance.
Here's some renderings of it on paper and also in 3D:
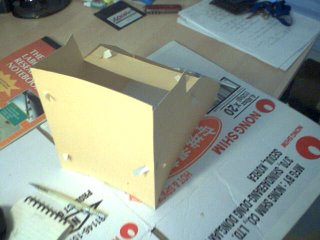

Above right one is me with the box model. hahaha.
 The picture above has the dimensions and etc.
For updating the songs, the only efficient way I thought of at the time and also not spending more money on parts, was to transfer via network.
I'd take out the Ethernet PCI card during when I'm using the mp3car (name I gave to the computer I'm building) because in order to make the box compact, I had to take it out.
When time came to update because I heard all my songs, I'd plug it in, enable Ethernet,
and transfer via Windows Networking.
It's just a bit tedious because the file that has the list of .pls files has to be updated,
and the .pls of the new album I'm uploading should have my recording of announcing the album on top, so that has to be recorded.
For turning the computer on, the Hyundai MultiCav desktop computer had a frontboard switchboard that had the Power, Reset buttons on. I tried pulling out the switches directly but I wasn't able to. Lack of tools.
So, I made a makeshift button out of.. Radioshack buttons, and pulled the switch signals
directly from pins of the switches on the boards by soldered wires.
I bought a 3-pack Tupperware ripoff-like small compartment containers from Marukai 98cents store. They have cuter and necessary stuff that seem better in quality than 99c store, I guess since it's a Japanese store. This became the little box I glued on to the box - my switchbox!
Having just buttons weren't cool enough. I also decided to pull LEDs off the board and make them shine inside the switchbox. Now the generic green and yellow LEDs weren't bright enough,
So I used my ultra-shine blue LEDs I bought some time ago in Korea to spiff things up.
Oh, there were a lot of wires that had to go into the switchbox, so I just used a LAN cable, with one end of the inner wires hooked up to relevant positions in the board and the other end hooked up to portions inside the switchbox. I think this solution is neat - MacGuiver level neat.
Power is gotten from cigar jack, into the inverter, where computer's power jack is attached.
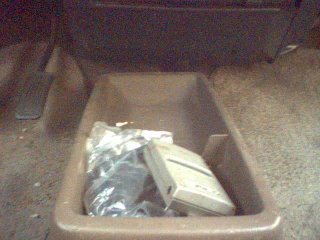
I think it's good to have inverters because it provides 110V generic outlets - stuff you have at home. I was able to make this work using the cigar jack because the computer comsumed small amounts of power, but people strongly dissuade going this route to get power. Turning on the inverter was by a switch attached to the inverter, but I pulled it out and attached it to my switchbox since the inverter was gonna get stashed away way down and back of the bottom of audio compartment, or here:
Another problem came up.
How would I fit them all in?
What casing would I use?
How do I update songs?
How would I turn the computer on?
For the case I decided to just saw wood and make a box out of wood.
It would have to be made as compact as possible and the design I came up with
had a motherboard enclosure in the lowest box, which cover had a space for power supply
and HDD, and that space was covered on top by a cover, latched so it could be opened for any maintenance.
Here's some renderings of it on paper and also in 3D:


Above right one is me with the box model. hahaha.
For updating the songs, the only efficient way I thought of at the time and also not spending more money on parts, was to transfer via network.
I'd take out the Ethernet PCI card during when I'm using the mp3car (name I gave to the computer I'm building) because in order to make the box compact, I had to take it out.
When time came to update because I heard all my songs, I'd plug it in, enable Ethernet,
and transfer via Windows Networking.
It's just a bit tedious because the file that has the list of .pls files has to be updated,
and the .pls of the new album I'm uploading should have my recording of announcing the album on top, so that has to be recorded.
For turning the computer on, the Hyundai MultiCav desktop computer had a frontboard switchboard that had the Power, Reset buttons on. I tried pulling out the switches directly but I wasn't able to. Lack of tools.
So, I made a makeshift button out of.. Radioshack buttons, and pulled the switch signals
directly from pins of the switches on the boards by soldered wires.
I bought a 3-pack Tupperware ripoff-like small compartment containers from Marukai 98cents store. They have cuter and necessary stuff that seem better in quality than 99c store, I guess since it's a Japanese store. This became the little box I glued on to the box - my switchbox!
Having just buttons weren't cool enough. I also decided to pull LEDs off the board and make them shine inside the switchbox. Now the generic green and yellow LEDs weren't bright enough,
So I used my ultra-shine blue LEDs I bought some time ago in Korea to spiff things up.
Oh, there were a lot of wires that had to go into the switchbox, so I just used a LAN cable, with one end of the inner wires hooked up to relevant positions in the board and the other end hooked up to portions inside the switchbox. I think this solution is neat - MacGuiver level neat.
Power is gotten from cigar jack, into the inverter, where computer's power jack is attached.
I think it's good to have inverters because it provides 110V generic outlets - stuff you have at home. I was able to make this work using the cigar jack because the computer comsumed small amounts of power, but people strongly dissuade going this route to get power. Turning on the inverter was by a switch attached to the inverter, but I pulled it out and attached it to my switchbox since the inverter was gonna get stashed away way down and back of the bottom of audio compartment, or here:

posted by lovebes at 2:45 PM
![]()

0 Comments:
Post a Comment
<< Home